1. Configure Elastic Beanstalk to allow both HTTP & HTTPS. Make sure to set an
SSL Certicate. This will require a refresh of the Elastic Load Balancer.
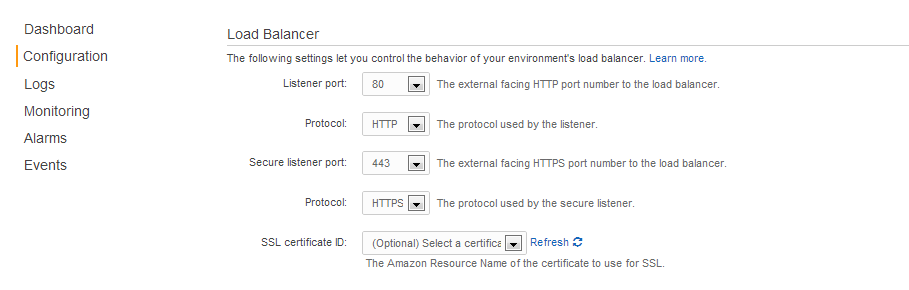 Now your application should be accessible by both HTTP and HTTPS.
2. Every Elastic Beanstalk application uses the Apache web server which can be used to redirect non-SSL traffic to the HTTPS endpoint. The easiest way to do this is to create a custom configuration file which creates the re-write rules.
3. Create (if you don’t already have) a “.ebextensions” directory in the root of the deployed directory. So in PHP apps, this is the top level or in Java apps this would be src/main/webapp
4. Create a Apache config file called “elasticbeanstalk.conf” in .ebextensions
5. I use the following rules in elasticbeanstalk.conf:
1 2 3 4 5 6 7 8 9 10 11 12 13 14 15 16 17 18 | |
6. Create a .config file in the same directory (i.e. https.config) and add the command for moving the .conf file to the correct spot:
1 2 3 4 | |
7. Deploy your application with the new config files
8. Restart Apache (or rebuild the environment) to pick up the changes
To restart Apache run: sudo /etc/init.d/httpd restart